Configuring Azure Application Gateway – Configuring Load Balancing
Configuring Azure Application Gateway
You now have some information about what Azure Application Gateway is and what it does. You will now experience deploying one and seeing how it works.
Creating an Azure application gateway
To create an Azure application gateway, perform the following steps:
- Navigate to the Azure portal by opening https://portal.azure.com.
- Create a new resource group for this exercise named AZ104-ApplicationGateway.
- Create a VNet with the following values:
• Subscription: Select a subscription
• Resource group: AZ104-ApplicationGateway
• Name: ApplicationGatewayVNET
• Region: A region of your choice (choose the same region for all subsequent resources in this chapter)
• Address range: 10.1.0.0/16
• Subnet name: Default
• Subnet Address range: 10.1.0.0/24
•NAT GATEWAY: Leave the default value
• Services: Leave the default value
- Open the newly-created resource group, click Overview on the left menu, then click Create.
- Type application gateway in the search bar and click Application Gateway in the pop-up dialog:
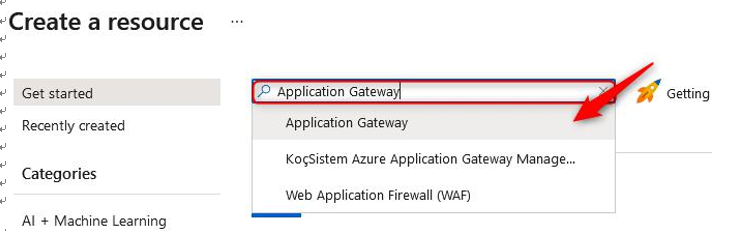
Figure 16.19 – Creating an application gateway
- Click Create.
- Enter the following values for the Basics tab, then click Next : Frontends >:
• Subscription: Select a subscription
• Resource group: AZ104-ApplicationGateway
• Name: ApplicationGateway
• Region: The same region as chosen for the preceding VNet
• Tier: Standard V2
• Enable autoscaling: Yes
• Minimum instance count: 0
• Maximum instance count: 2
• Availability zone: None
• HTTP2: Disabled
• Virtual network: Select the VNet you created previously
• Subnet: default (10.1.0.0/24)
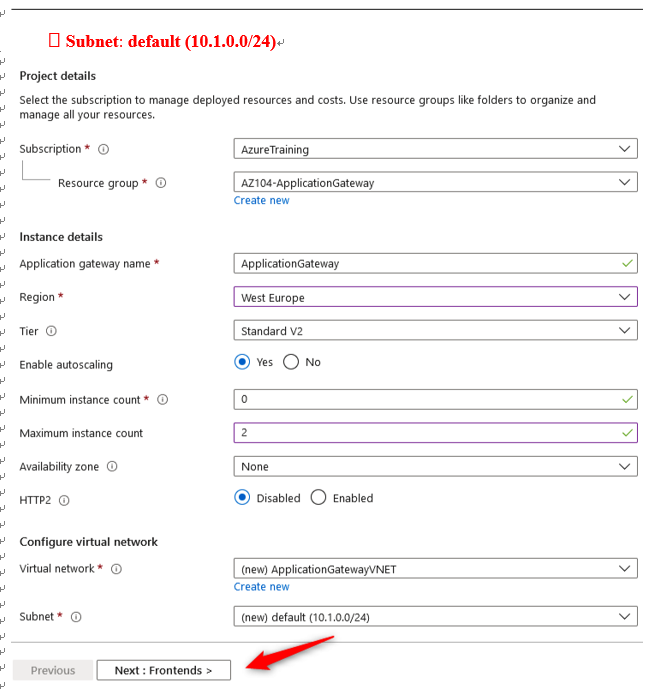
Figure 16.20 – Application Gateway – Basics
- Enter the following values for the Basics tab, then click Next : Backends >:
Frontend IP address type: Public
Public IP address: Add new (name this as something unique)
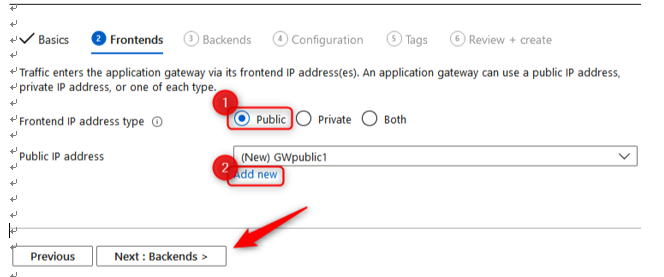
Figure 16.21 – Application Gateway – Frontends
- Click Add a backend pool. In the pop-up blade, enter the following and click Add:
Name: backendpool
Add backend pool without targets: Yes
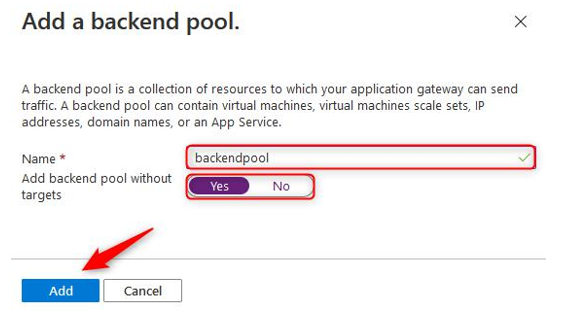
Figure 16.22 – Application Gateway – backend pool
- Click Next : Configuration >.
- Note that your configuration screen lists your frontend and backend pools. The routing rules are the magic connectors between these linking public IPs to your backend resources. Click Add a routing rule. In the pop-up blade, enter the following:
• Rule name: webtraffic
•Listener name: webtraffic
•Frontend IP: Public
•Protocol: HTTP
•Port: 80
• Listener type: Basic
•Error page url: No
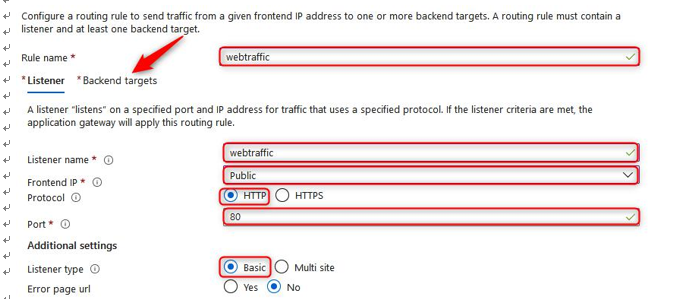
Figure 16.23 – Application Gateway – Listener
The rule we are configuring will listen for HTTP traffic on port 80 through the public IP we created. The Basic listener type forwards all traffic from any frontend IP to a backend pool, the Multisite option will listen on the domain and redirect according to the specified prefix given for the routing rule. Click the Backend targets tab.
- Enter the following and click Add:
•Target type: Backend pool.
•Backend target: Select backendpool in the dropdown.
•HTTP settings: Add new. Then, enter the following: HTTP settings name as httpset1, Backend protocol as HTTP, Backend port as 80, click Yes for Override with new host name, and select Pick host name from backend target. You can leave the rest as the defaults:
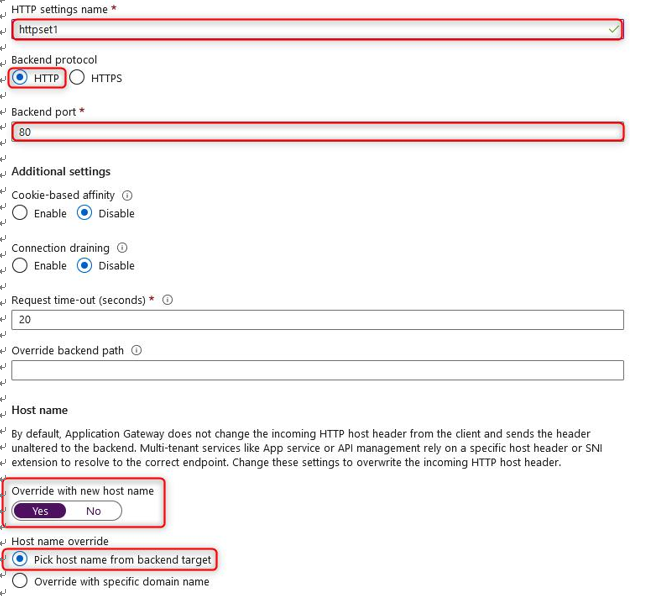
Figure 16.24 – Application Gateway – HTTP settings
- Click Add.
- Click Next : Tags > and then Next : Review + create >. Click Create.
Now that your application gateway is deployed, you will need an application on the backend to test the service; we will deploy this next.