Creating the load balancer – Configuring Load Balancing
Creating the load balancer
Now, we can create the load balancer using the Azure portal as follows:
- Navigate to the Azure portal by opening https://portal.azure.com.
- Open the AZ104-InternalLoadBalancer resource group we created, click
Overview on the left menu, then clickCreate. - Click See more in Marketplace next to Popular products:

Figure 16.4 – See more in Marketplace
- Click Networking on the left Categories pane and click Load Balancer on the right blade screen. Then, click Create:
Figure 16.5 – Load Balancer
- Enter AZ104-InternalLoadBalancer for Resource group,
PackLoadBalancer for Name, West Europe for Region, set SKU to Basic, Type to Internal, and finally, Tier to Regional. Click Next : Frontend IP configuration >:

Figure 16.6 – Creating a load balancer
- Click + Add a frontend IP configuration. Enter PacktLBFEName as Name, select PackLBVnet as Virtual network, and in Subnet, select PacktLBBackendSubnet. Set Assignment to Dynamic, and click Add:
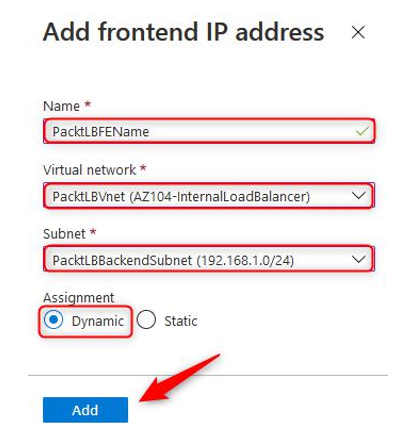
Figure 16.7 – Add a frontend IP configuration
- Click Next : Backend pools >.
- Click + Add a backend pool. Enter PacktLBBackendPool as Name, set Associated to as Virtual machines, IP Version as IPv4, and then click + Add under Virtual machines.
- On the pop-up screen, select PacktLBVM1 and PacktLBVM2, then click Add.
- Click Add again:
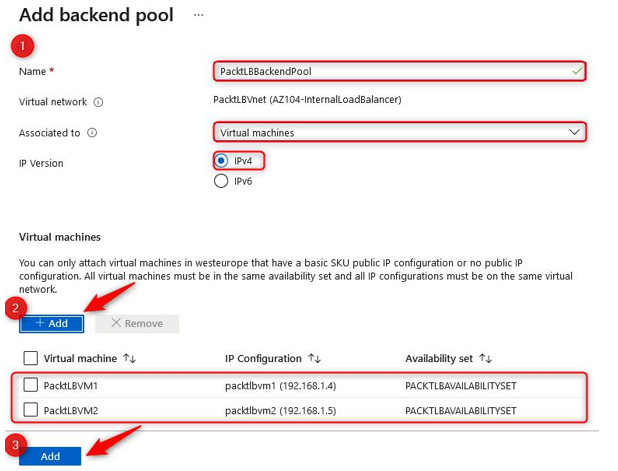
Figure 16.8 – Add a backend pool
- Click Review + create. Click Create.
You now have the load balancer resource configured with a frontend IP address. You have also configured your backend pool in line with the deployment consisting of PacktLBVM1 and PacktLBVM2. We now need a mechanism for load balancing traffic between our VMs and we need a method of detecting the health of our services on the VMs. Next, we’ll configure the health probes for our load balancer before moving on to investigating rules to distribute the traffic to the VMs.
Creating the health probes
The next step is to create a health probe for the load balancer, which is used for the load balancer to monitor the status of the VM. The probe will dynamically add or remove VMs from the load balancer rotation, based on the response to the health checks that are performed by the health probe. To create a health probe, take the following steps:
- Open your Load Balancer resource.
- Under Settings, select Health probes, and then select Add:
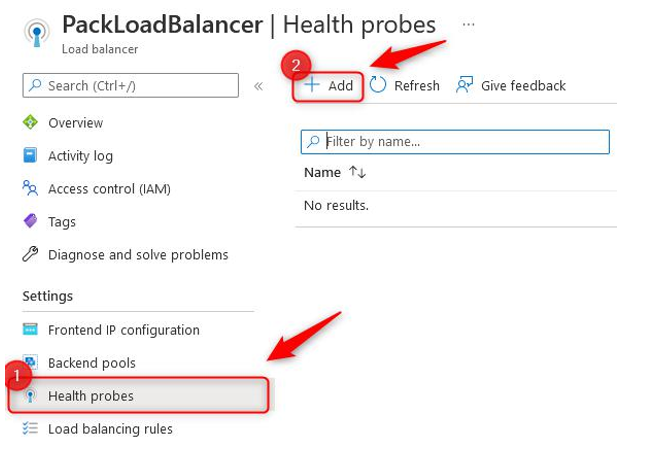
Figure 16.9 – Health probe
- Enter PacktHealthProbe as Name, set Protocol to HTTP, set Port to 80, Path to /, Interval to 5 (this is the number of seconds between probe attempts), Unhealthy threshold to 2 (this is the number of consecutive probe failures that occur before a VM is considered unhealthy), and click Add:

Figure 16.10 – Add health probe
Now that you have deployed your health probe for the load balancer, we will move on to creating your first load balancing rule.