Deploying your web app – Configuring Load Balancing
Deploying your web app
You will need at least one application on the backend of your application gateway for the public IP address you created to route through to the application. We will deploy that app now, following these steps:
- Open the Azure CLI and select PowerShell, or open pwsh as you did in the public load balancer exercise.
2. Run the following command, replacing the name with a unique name you choose and the resource group with the one you created previously:
New-AzWebApp -name “azwebapp12341234” -ResourceGroupName “AZ104-ApplicationGateway” -Location “westeurope”
3. Open your Application Gateway resource and click Backend pools on the left navigation menu under the Settings context. Click on your backend pool.
4. Dropdown the Target type selector and change to IP address or FQDN, and set Target to the web app you just created followed by .azurewebsites.net (forexample, azwebapp12341234.azurewebsites.net). Click Save.
5. Click on Overview for your application gateway and note the frontend public IP address and paste it into your browser. Note that it fails.
6. Now, go to Health probes on the left menu underSettings and click Add.
7. Enter the following details and click Test. If a health probe has already been created, then skip to the note below the settings:
- Name: httpprobe
- Protocol: HTTP
- Host: The same FQN you used previously
- Path: /
- HTTP settings: httpset1
- All other settings leave as their default state
If you discover that a health probe already exists, then please use the following settings. Adapt the hostname to what you have for your web app and use the preceding settings where necessary:
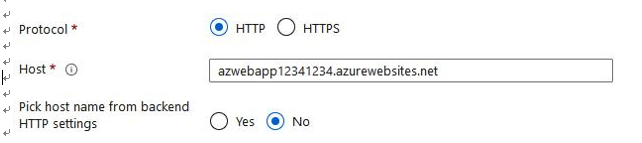
Figure 16.25 – Application Gateway – health probe
8. After a successful validation, click Add:

Figure 16.26 – Application Gateway – health probe success test
You have just successfully configured your web app and added it to the application gateway. You are now ready to test it, which we will run through next.