VPN server deployment 2 – Integrating On-Premises Networks with Azure
- On the Add roles and features wizard, click Next.
- Select Role-based or feature-based installation. Click Next.
- Click Next again.
- Select Remote Access and click Next:
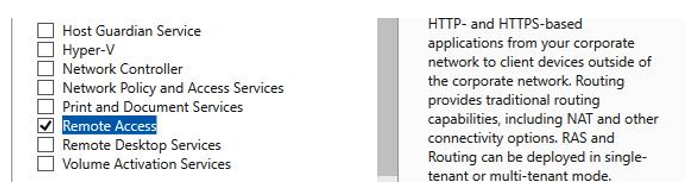
Figure 17.9 – Remote Access feature
- For the Features and Remote Access pages, click Next.
- For Role Services, select Direct Access and VPN (RAS). Then, click Add Features on the pop-up window that appears. Click Next.
- Click Next until you get to the confirmation screen and click Install.
- Before closing the wizard, click Open the Getting Started Wizard:
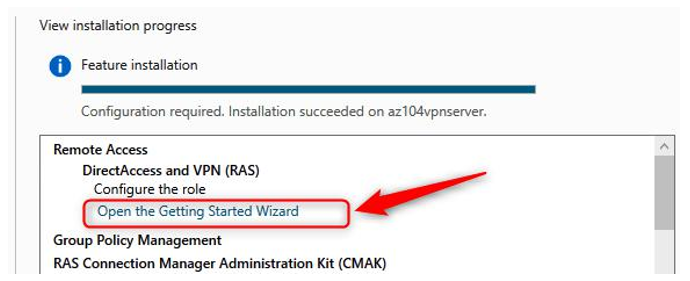
Figure 17.10 – Open the Getting Started Wizard
- Click Deploy VPN only.
- Right-click on the Start button and click Computer Management:
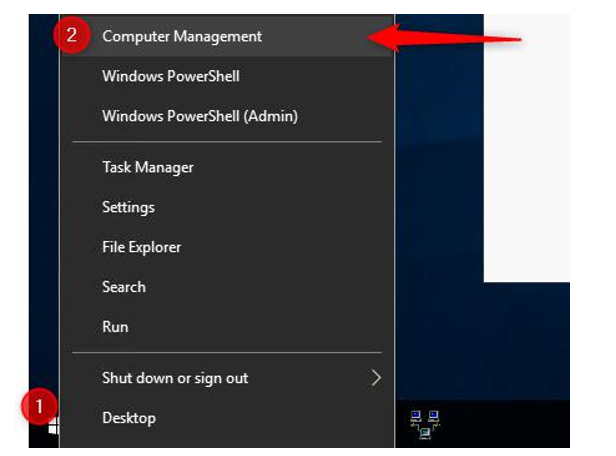
Figure 17.11 – Right-click on Start
- Click on Device Manager, then click on Action on the top menu, and click Add legacy hardware:
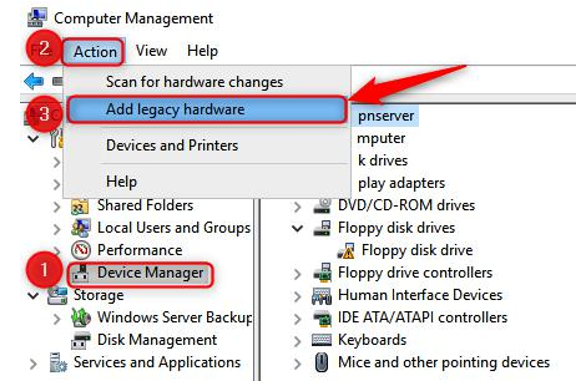
Figure 17.12 – Device Manager
- On the wizard, click Next. Then click Install the hardware that I manually select from a list (Advanced) on the subsequent screen. Click Next:
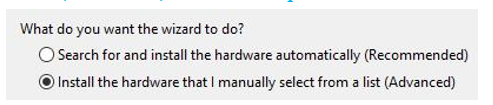
Figure 17.13 – Installing hardware
- Scroll down to select Network adapters and click Next.
- Select Microsoft under Manufacturer, and then Microsoft KM-TEST Loopback Adapter under Model:
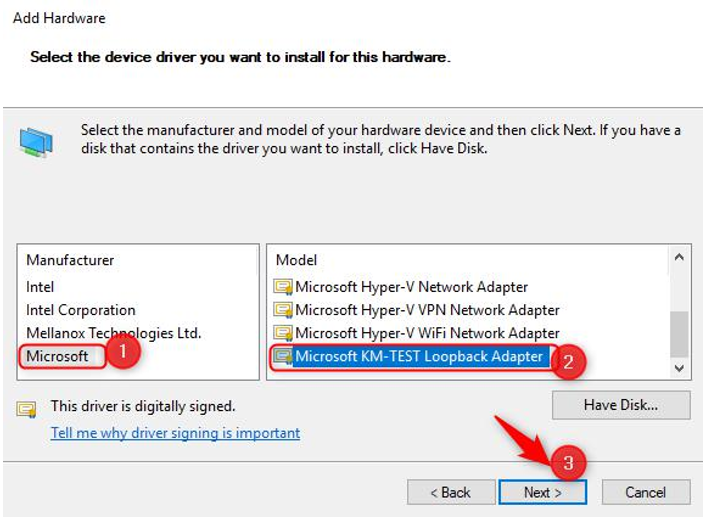
Figure 17.14 – Adding a loopback adapter
- Click Next, then click Finish on the screens that follow. Close the Computer Management window.
- On the Routing and Remote Access window, right-click on your server and click Configure and Enable Routing and Remote Access on the pop-up window:
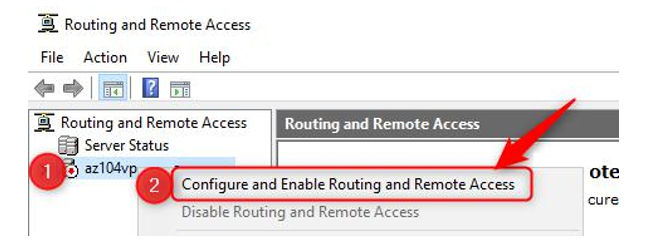
Figure 17.15 – Configure routing feature
- On the next wizard, click Next. Select the Virtual private network (VPN) access and NAT option. Click Next:

Figure 17.16 – VPN and NAT
- Select the Ethernet interface (which will show the 99.0.0.0 range next to it). Click Next:
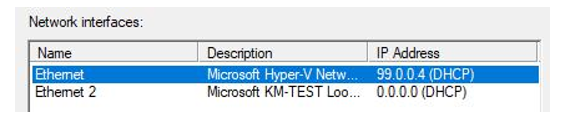
Figure 17.17 – Ethernet interface
- For IP Address Assignment, select From a specified range of addresses. Click Next:
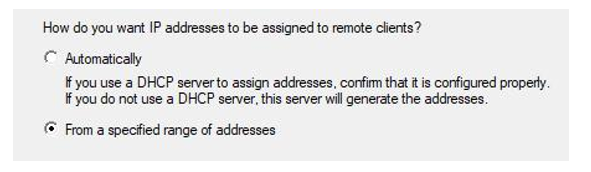
Figure 17.18 – IP Assignment on VPN
- Click New…. Specify as follows and click OK. Click Next:
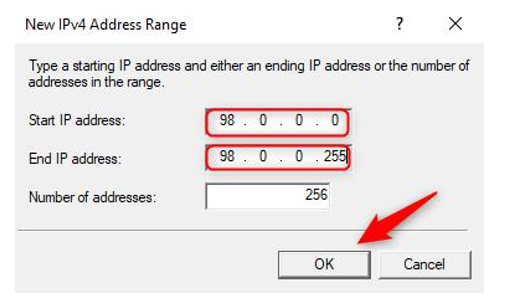
Figure 17.19 – New IPv4 range
- Leave the next selection as No and click Next:

Figure 17.20 – RADIUS server configuration
- Click Finish. You will get warned about your firewall and you will be required to open port 4500 and 500 UDP on both inbound and outbound on the server through the Windows Defender Firewall with Advanced Security window.
- When the following screen pops up, click OK:
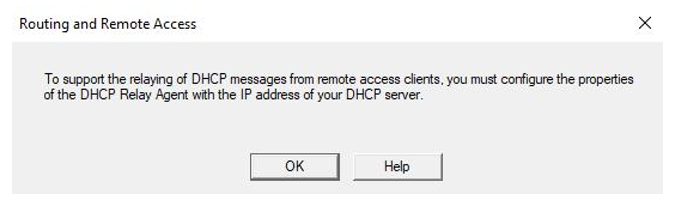
Figure 17.21 – DHCP option
- Click the Start button and then Windows Security:
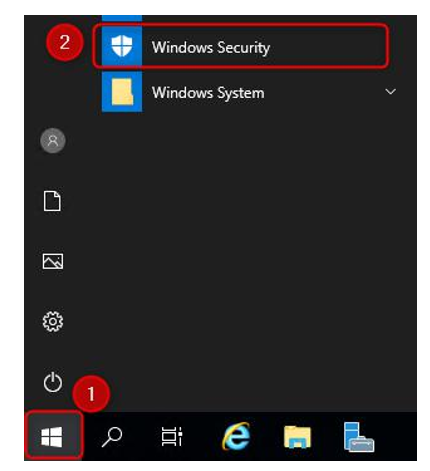
Figure 17.22 – Windows Security
- Click Firewall & network protection on the left, thenclick Advanced settings on the right:
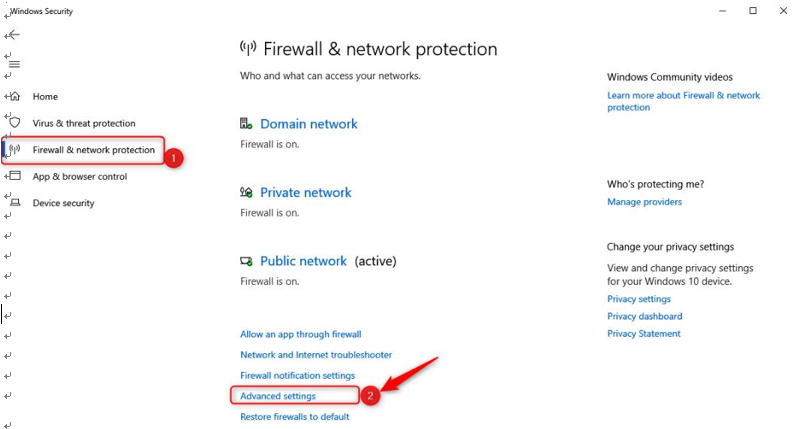
Figure 17.23 – Firewall and network protection
- Click Inbound Rules on the left and thenNew Rule… on the right:

Figure 17.24 – New Inbound Rule
- Select Port and click Next.
- You can configure the rule as follows, and click Next:

Figure 17.25 – UDP rule
- Click Allow the connection and then click Next.
- Click Next again, leaving Domain, Private and Public selected.
- Enter Name as VPNGW-inbound. Click Finish.
- Repeat the process for outbound, changing the name to VPNGW-outbound, and ensure that you select Allow the connection.
- Navigate back to the Interfaces and click
Routing and Remote Access window. Right-click on Network New Demand-dial Interface…:
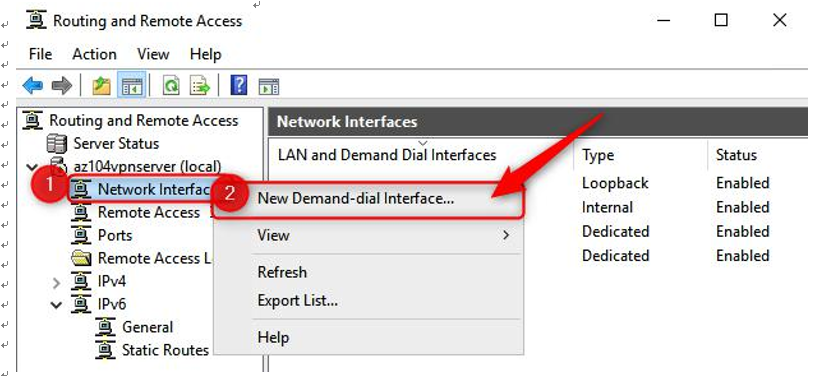
Figure 17.26 – New Demand-dial Interface
- Click Next, then change the name to Azure VPN, and click Next.
- Select Connect using virtual private network (VPN) and click Next.
- Select IKEv2 and click Next.
- Enter the IP address of the VPN gateway from Azure. Click Next on this and the next screen.
- Click Add, then enter the following and click OK (if your VNet associated with the VPN gateway is a /16 range, then your subnet is 255.255.0.0; if it is a /24 range, then it is 255.255.255.0). Click Next:
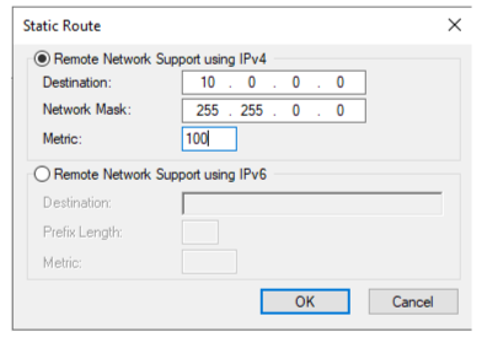
Figure 17.27 – Static route
- Click Next, then Finish.
- Right-click Azure VPN and click Properties.
- Click the Security tab and then click Use preshared key for authentication. Generate a key you would like to use as a secret for the S2S connection, paste it into the Key field, and click OK:
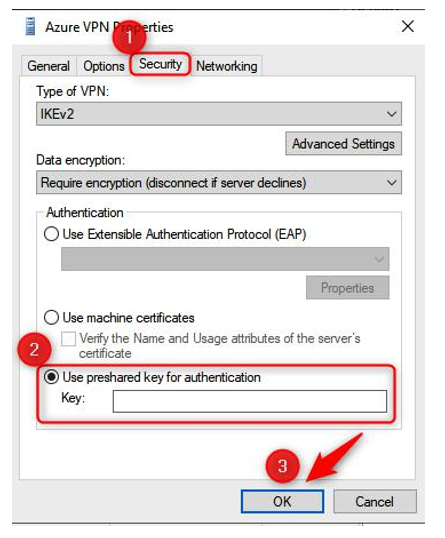
Figure 17.28 – IKEv2 key
You have just configured your VPN server for the VPN gateway in Azure. Next, we will configure the Azure VPN Gateway side to establish an S2S connection.